Wednesday, 11 September 2013

Gromit hunt!

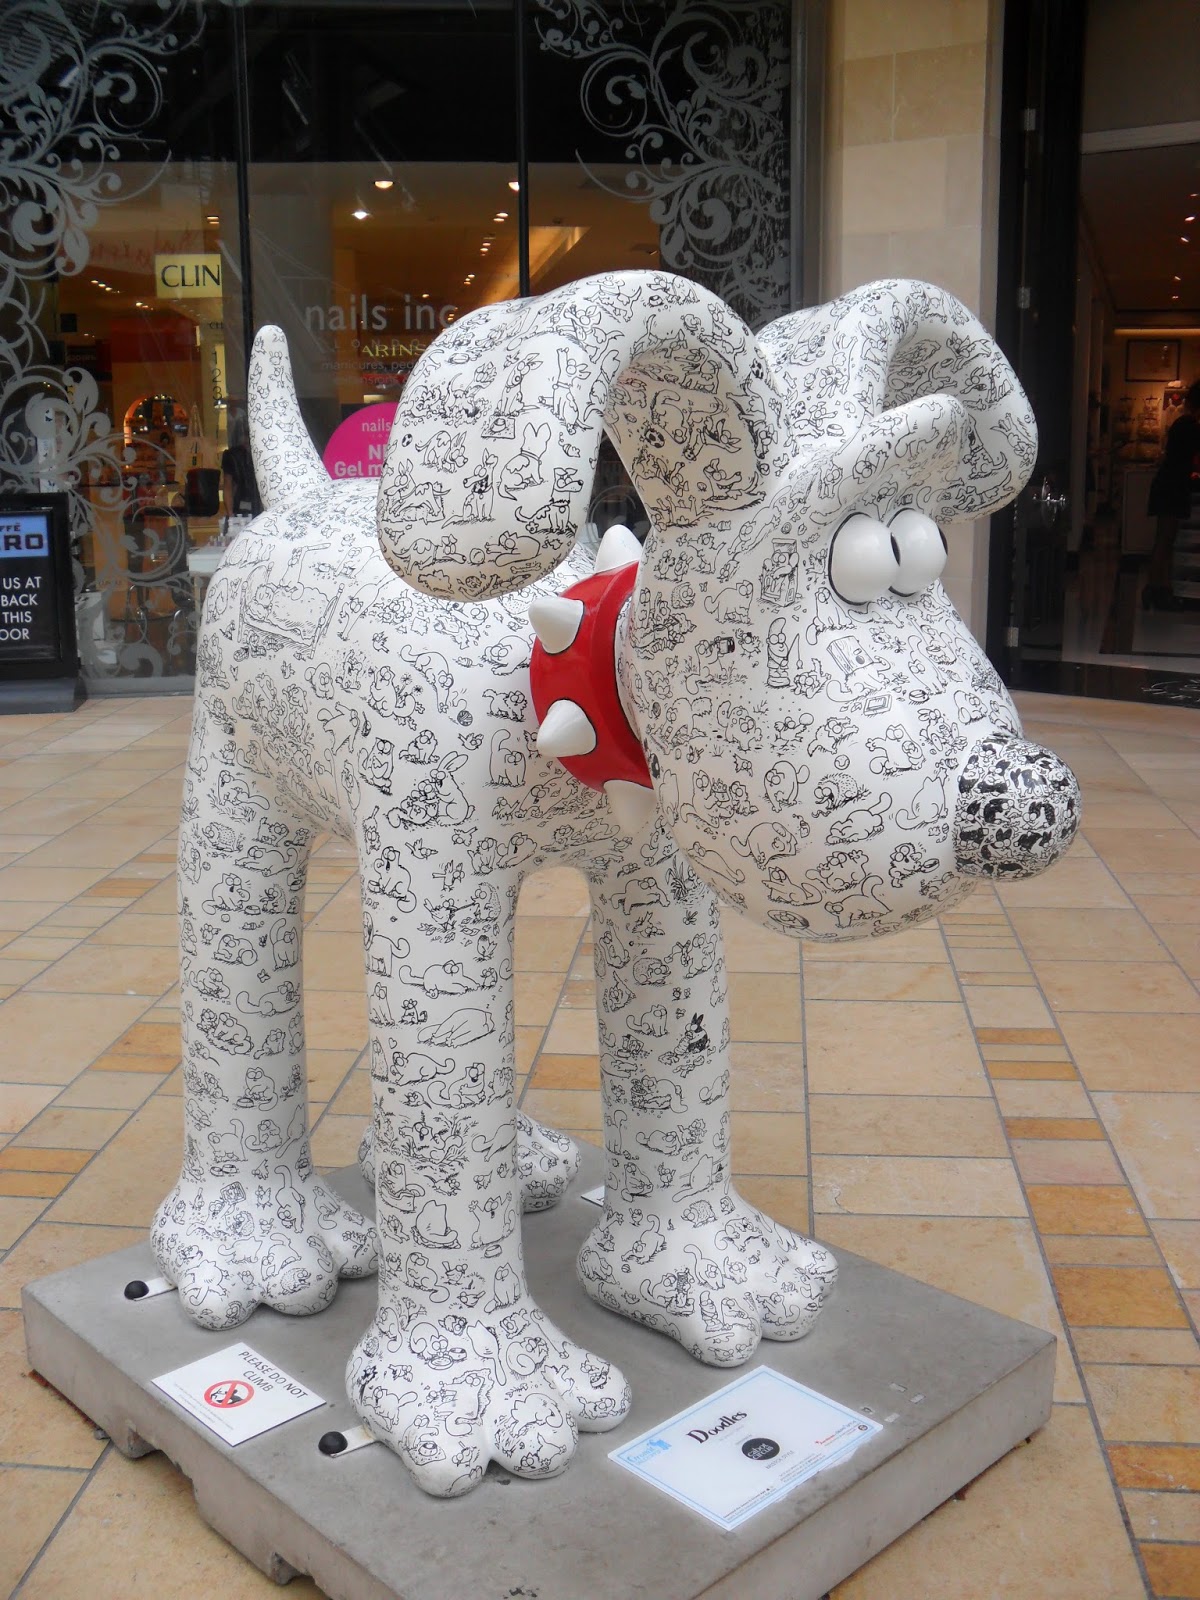
Bristol (and the surrounding area) has been home to 80 Gromits for the past few months, decorated in a variety of ways. Seeing as I live nearby and I haven't actually seen any of them yet I decided to go on a Gromit hunt before they disappeared, and managed to find 25! 

These are some of my favourites...

 Where's Wallace??

 Doodles!

 The King

 Gromit-o-matic (love the names for the different parts of his body!)

Gromit Lightyear

Wednesday, 28 August 2013

Make up brushes travel roll


Between visiting friends/boyfriend and trips across the Channel on press trips (one of the perks of working on a magazine about France!) it seems like I'm permanently packing a weekend bag for nights away from home. You'd think by now I'd be an expert at packing light but I always seem to be cramming things into my bag so I am a big fan of anything that makes travelling easier and this roll is an ideal way to carry all my make up brushes.

The idea for making this came from the blog Trends With Benefits which I discovered recently and is fill of great ideas and inspiration.


First you need to decide how many brushes and what size you need to fit in (as you can see I have a lot!) and measure the fabric accordingly to be large enough to fit in all of your brushes.


You need two pieces of fabric for the inside and outside of the roll, a contrasting fabric to form the pockets for the brushes and a piece of felt to sandwich between the two main pieces to stiffen the roll and ribbon to tie the roll.


I pinned the outside piece of fabric onto the felt and sewed along the edge to attach them together.

Then I folded the contrasting fabric in half (right sides together), sewed along the long edge and turned the right way round. Position on the inside piece of fabric and pin along three edges. 


Next you need to mark out the slots for the different brushes. I did this by placing each brush between the main fabric and the contrasting fabric and pinning enough space for each brush - the pins may need some tweaking to fit all the brushes in. Then sew neatly along the pin lines to create the brush slots.


Work out where the ribbon is going to attach and pin both ends onto the wrong side of the outside/felt fabric. Place the inside and outside fabrics together (right sides together) with the ribbon sandwiched in between. Then sew along three edges and along part of the final edge leaving enough space to turn the roll the right way round. Sew the gap up using an invisible stitch.


Et voilà a travel roll to keep all your make up brushes neat when you're on your travels! 


Saturday, 10 August 2013

Rejuvenated Ottoman


The inspiration for the rejuvenation of this ottoman came from the TV programme 'Kirstie's Vintage Home' which I absolutely loved! It gave me heaps of ideas to give old furniture a new lease of life and I've slowly been putting them into practice around my family home.


This was how the ottoman looked before I got my hands on it. Pretty bland and uninspiring!


The first step was to paint the ottoman inside and out. It is going into my parent's bedroom which is pale blue and red so I used this as my colour scheme. I used the same paint that was used to paint their walls so just ordinary emulsion paint. It needed 2 coats of paint to cover the wood completely but if you wanted to keep the wood effect you could use a watered down paint as a wash and the wood grain should still show through.


Once the paint had thoroughly dried I covered the top of the lid with wadding, bought quite cheaply from Hobbycraft. I trimmed the edges so the wadding fitted and stuck it down with double-sided tape.


Next step was to cover the lid with fabric. I chose this gorgeous patterned fabric - in red to match the colour scheme. First I unscrewed the hinges so the lid was separated from the box. Place the fabric with the pattern straight and centred and then flip the lid over. 

Now fold over the edges of the fabric to create a hem to hide the raw edges. This stage is a lot easier with two people so one can hold the fabric taut while the other hammers the tacks in. You can either use a staple gun or hammer tacks in to secure the fabric.

Secure the fabric in the centre of each edge to keep it in place and then work your way around the lid hammering in as many tacks as needed. I folded the corners like you would when wrapping a present, you may need to trim some of the fabric otherwise it will be too bulky.


Et voilà a super stylish ottoman to provide storage and look fantastic! I'm quite jealous this is going in my parent's room, I might have to find one for me!


Tuesday, 18 June 2013

Books and Buttons


These are my finds at a recent antiques fair and flea market in my local town hall. I feel I was very restrained! I have a huge love for the old penguin books and have started collecting some popular titles, they aren't worth much money but they look very pretty on a book shelf! This green Agatha Christie I picked up for £1 (bargain!) and has been added to the two I found in a second-hand book shop (Lady Chatterley's Lover and Wuthering Heights) on my shelf - three counts as a collection right?!

The buttons were £4 for the four large ones and £3 for the small ones, all mother of pearl, and will be added to my sewing basket - I haven't got a specific use in mind for them but buttons are always a useful thing to have!

Sunday, 2 June 2013

Vogue Wall Art


The idea for this design came from some art I saw at a local antiques fair. I love visiting antiques fairs, although most of the items are out of my price range you sometimes discover hidden bargains or, more often, find some inspiration for things to create at home for a fraction of the price. At this particular antiques fair I was struck by a stall selling wall art and particularly several pieces that were a framed film poster and a framed dressmaking pattern. 

Several days later I was browsing Waterstones on my lunch break (another favourite pastime) and found this selection of postcards that showed iconic Vogue covers spanning a century and decided they would be perfect to create my own wall art. I purchased a cheap large picture frame and set about choosing my favourite covers to put in it.
Et voilà a really simple but effective way of creating an individual frame to decorate your wall. The beauty of it is you can easily change the postcards around if you fancy a change and can use any poster or postcards to fill it. When I have some free wall space my next frame will be full of penguin book covers!  


Sunday, 12 May 2013

Owl Phone Case


I absolutely love this owl phone case, which would make a great birthday or Christmas present and is a fun way to use up scraps of fabric lying around your fabric box. It is also perfect if ,like me, you have a tendency to drop your phone or let it get battered about in your handbag!


This is an adaptation of a pattern that I first came across in Crafty Magazine made by Lova Revolutionary but instead of buying one I decided to make my own. First I had to make a pattern for all the different pieces. I began by drawing around my my mobile to get the right size and then drawing the owl design onto the shape. I cut out two templates of the basic shape leaving a 1 cm seam allowance around the edge, one for the front and one for the back, and gave the front pattern a slight curve at the top so the top of the phone would be visible. I then traced over each separate piece of my owl design to get templates for each part - two eyes, two wings and a triangle for the top of the head - leaving a slight seam allowance for all the pieces except the eyes.

I chose the fabrics I wanted to use for each section, pinned on the paper patterns and cut them out - dark green for the head/front, yellow check for one wing and the head triangle, purple floral for the other wing, white felt for the eyes, white and pink floral for the inside and back. I also used a felt to strengthen the front and back of the case.

Next I sewed the outer and inner back pieces together, right sides together, along the sides but leaving the top open. Then stuffed the back felt piece inside and sewed up the top using an invisible slip stitch and that's the back done.

For the front I first pressed the seams of the wings, head and triangle pieces to give a nice crease to show the seam making it easier to sew on. I then sewed the wings onto the green front piece using an invisible slip stitch, the purple one first and the yellow wing on top. Next the triangle was sewn onto the green head again using an invisible slip stitch.
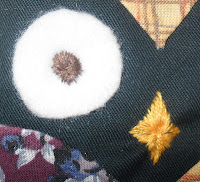
To create the eyes I placed the white felt circles in position on the head and embroidered a brown circle on top using a thick embroidery thread - this secured the eyes in place and created a brown iris for the owl. I also embroidered the beak using a yellow embroidery thread directly onto the owl's head.

Similar to the back, place the inner front shape and the newly created owl front together, right sides together, and sew along the edge leaving the top open. Turn it the right way, stuff the felt inside and sew up the top using an invisible slip stitch.

Finally place the front and back of the case together and sew them together using a blanket stitch with a thick, contrasting embroidery thread (I decided on light blue). I also blanket stitched the top to finish the owl off. Et voilà an individual phone or iPod case to keep your device safe and look pretty!


Saturday, 4 May 2013

Floral Earring Holder


 This is a great solution to the problem of storing your stud earrings with the bonus of looking pretty on your dressing table at the same time!

I have accumulated a lot of earrings which tend to become scattered around my bedroom because there was nowhere to store them. So I had been looking for a way to neatly keep them together when inspiration for this holder struck. The box was originally the packaging for a pen I got for my birthday (I have a huge weakness for pretty stationary...) that I kept because it was too pretty to throw away. I was trying to find a way to use it when I came across some foam that used to be the inner of a garden chair cushion which would be perfect to store my earrings.

So, this was really simple to make. First I drew around the box onto the foam and cut it out using a craft knife. Then I simply trimmed it until it was the right size and fit, squeezed it into the box and arranged my earrings by stabbing them into the foam. Et voilà, tidy earrings! The only problem is that I have too many earring to fit into the holder so I am on the look out for another box that can store the rest!